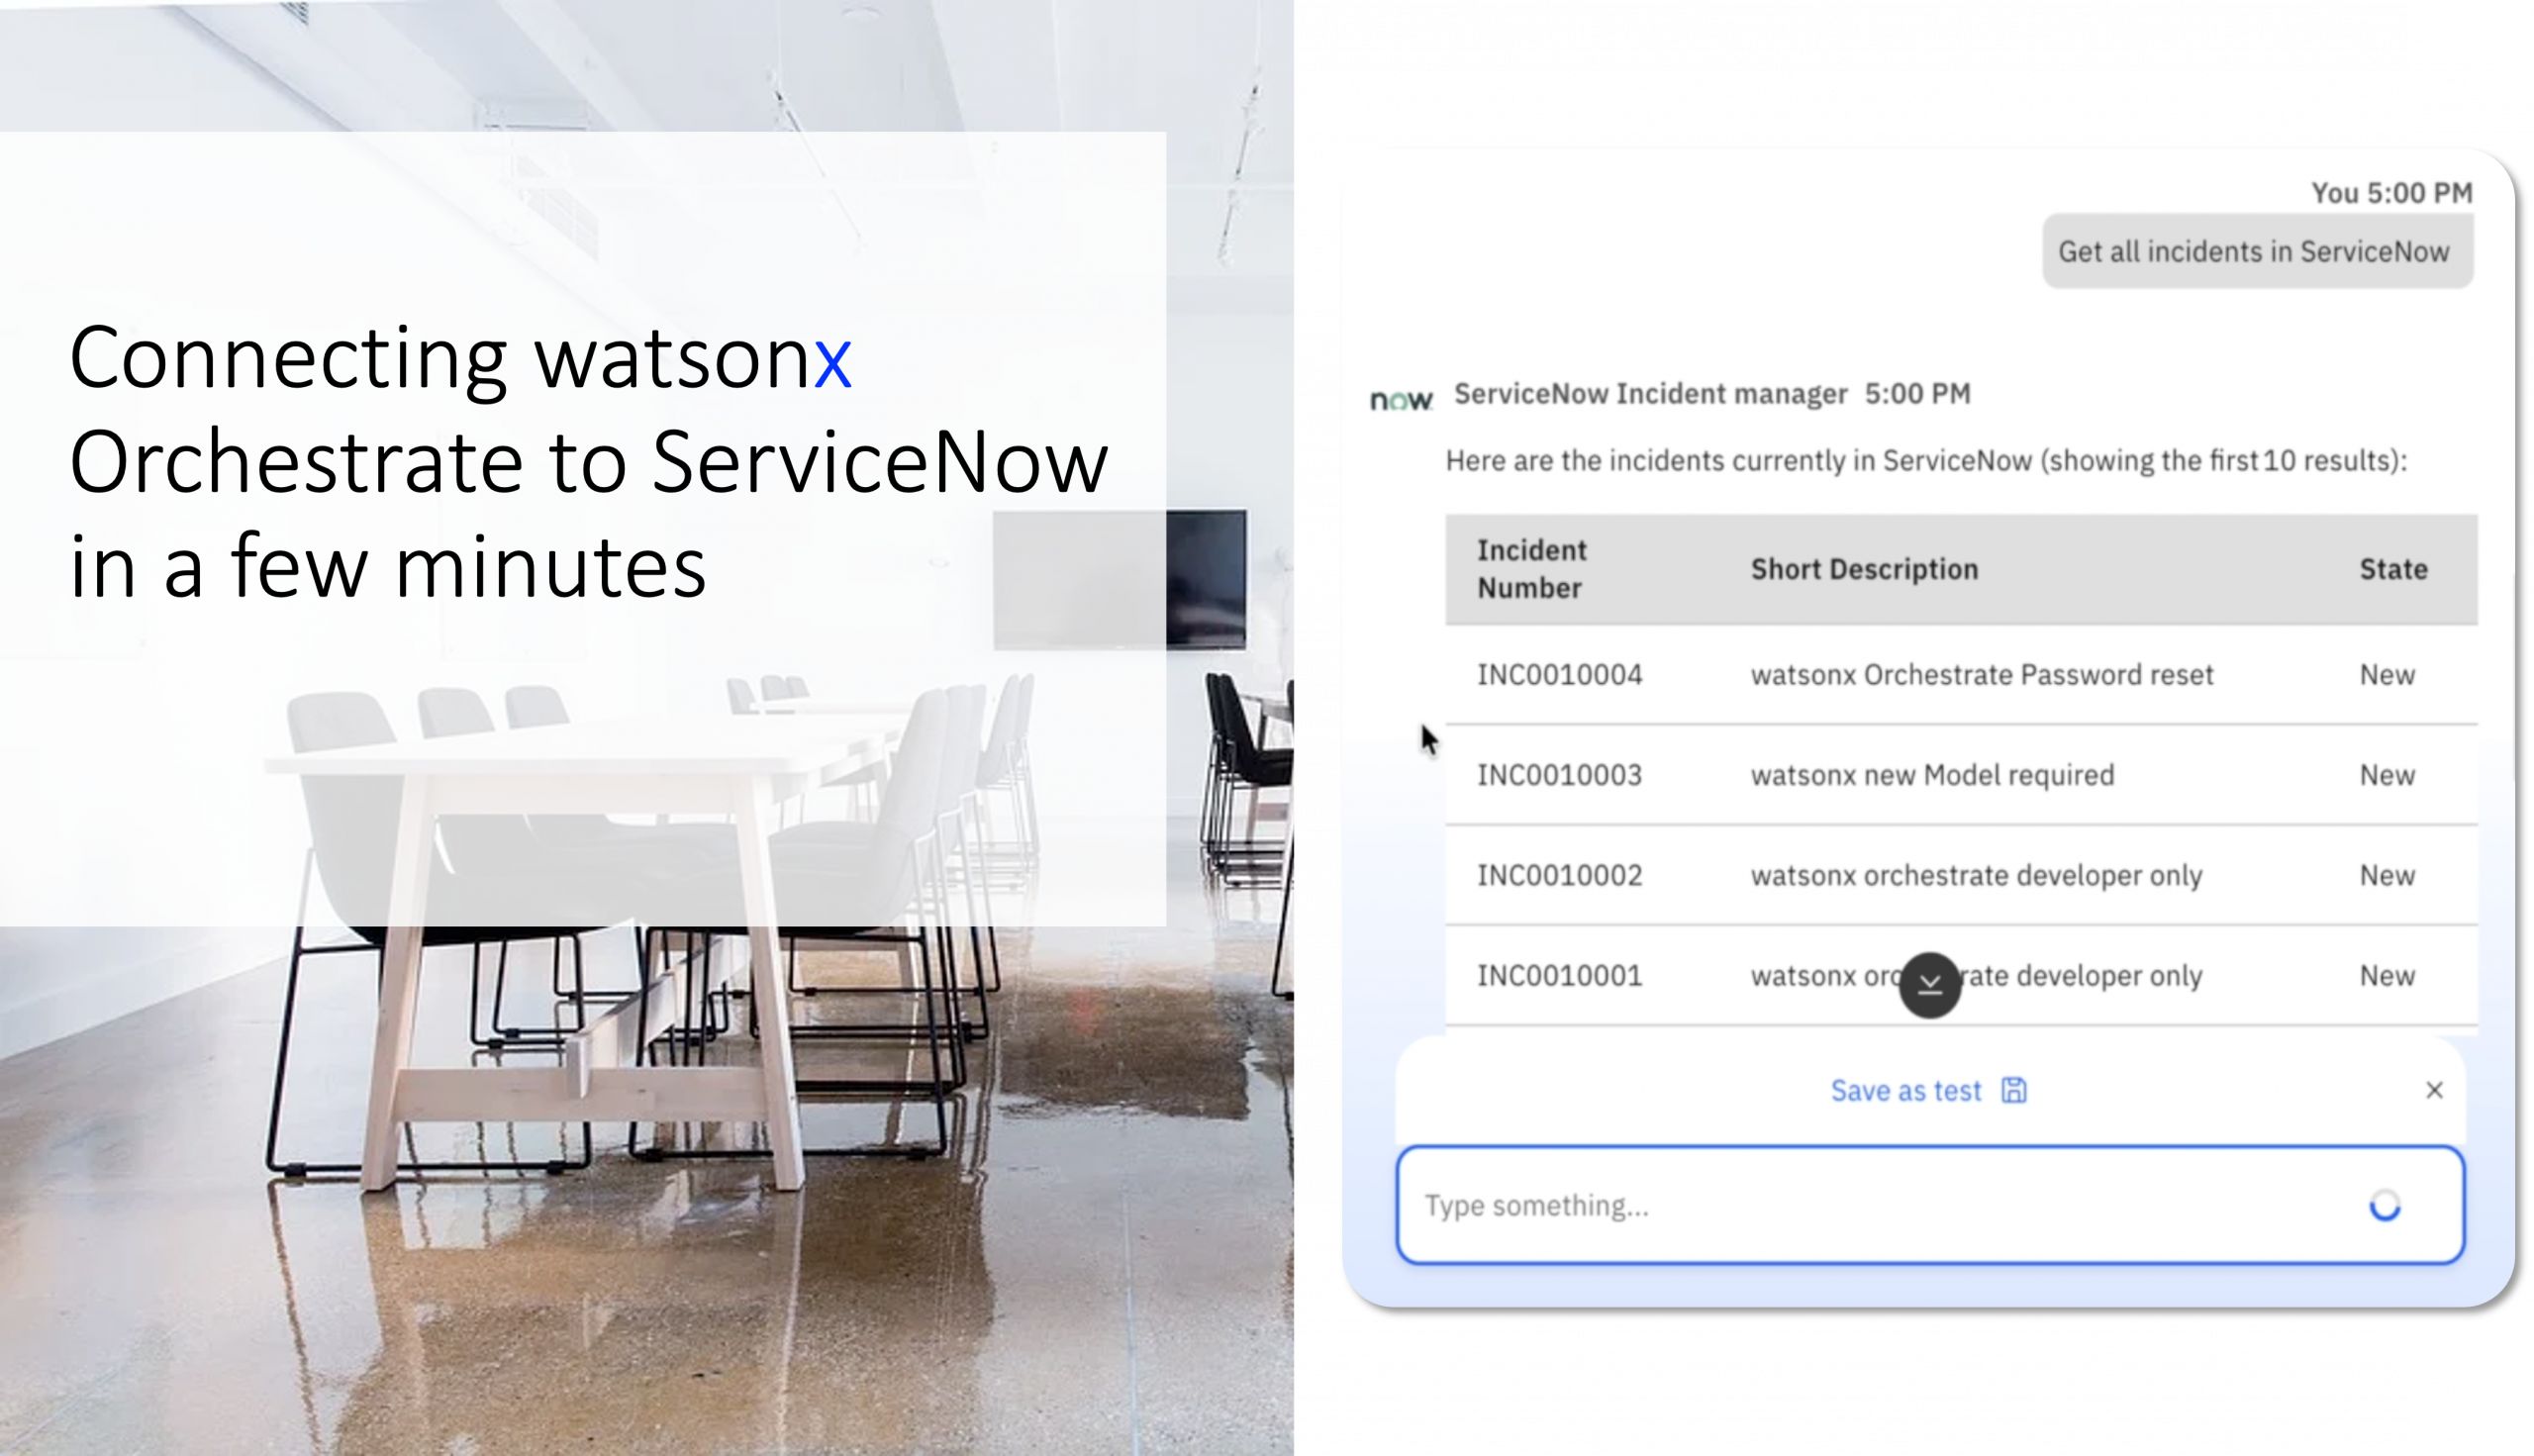
How to connect a ServiceNow Developer Instance to watsonx Orchestrate and start creating incidents with a prebuilt Incident Manager Agent.
One of the quickest and most impressive demos for IBM watsonx Orchestrate is connecting it to ServiceNow. With a free ServiceNow Developer Instance and the prebuilt Incident Manager Agent available in the watsonx Orchestrate Agent Catalog, you can create and manage incidents using natural language in just a few minutes. The ServiceNow Application Registry is used to generate the Client ID and Client Secret needed by external applications. [servicenow.com]
In this guide, I will walk through the complete setup process, including creating a ServiceNow Developer Instance, configuring OAuth access, connecting it to watsonx Orchestrate, and verifying the integration by creating your first incident.
Prerequisites
Before getting started, you will need:
- A watsonx Orchestrate environment
- A ServiceNow Developer account
- Access to the watsonx Orchestrate Agent Catalog
- Permission to create connections in watsonx Orchestrate
Step 1: Create a ServiceNow Developer Instance
Create a free developer account through the ServiceNow Developer Program.
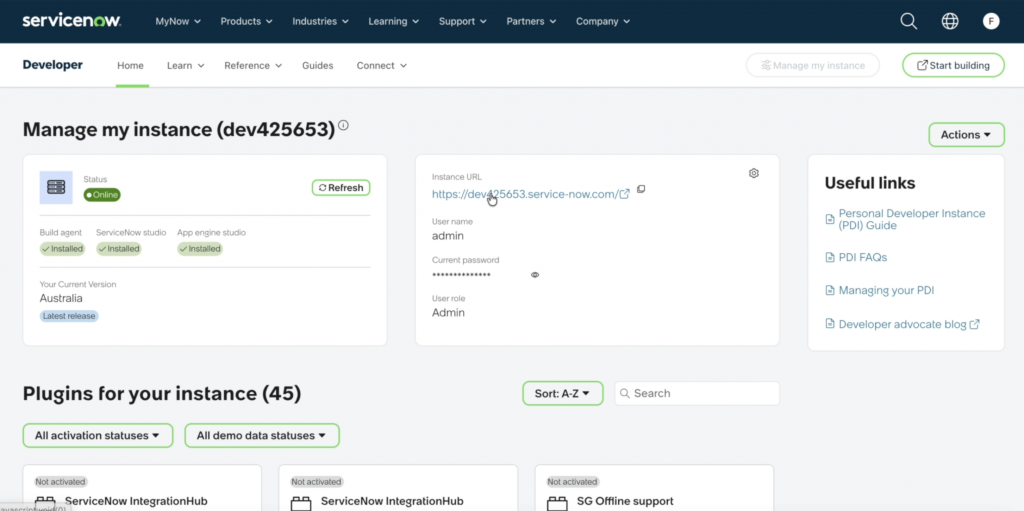
ServiceNow Developer Portal: developer.servicenow.com
After signing up:
- Navigate to Manage Instance
- Click Open Instance
You will receive a personal ServiceNow instance similar to: https://dev123456.service-now.com
You will also receive credentials similar to:
Username: admin
Password: ********
Save these credentials in a secure location such as a password manager. You will need them later when connecting watsonx Orchestrate.
Step 2: Log In to Your ServiceNow Instance
Open your ServiceNow instance URL and log in using the credentials provided during instance creation.
Example:
https://dev123456.service-now.com
After logging in you should see the ServiceNow administration interface.
Step 3: Create an OAuth Application Registry
watsonx Orchestrate connects to ServiceNow through OAuth.
In ServiceNow navigate to:
All → System OAuth → Application Registry
Click: New
Select: [Deprecated UI] Create an OAuth API endpoint for external clients
Although marked as “Deprecated UI”, this remains an easy option for creating OAuth credentials for watsonx Orchestrate integrations. [servicenow.com]
Configure:
Name: watsonx-orchestrate
Click: Submit
ServiceNow will automatically generate:
- Client ID
- Client Secret
Store both values securely.
Step 4: Update the OAuth Scope Restriction
Open the newly created OAuth application.
Under Scope Restriction, you may see:
Securely Scoped
During testing, ServiceNow returned the following error when the Incident Manager Agent attempted to access the Incident API: “Access to unscoped api is not allowed”
For a personal ServiceNow Developer Instance used for demonstrations, changing the scope restriction to: Broadly Scoped allowed the Incident Manager Agent to access the ServiceNow Incident API successfully.
Update the value to: Scope Restriction: Broadly Scoped and save the application.
Step 5: Configure the ServiceNow Connection in watsonx Orchestrate
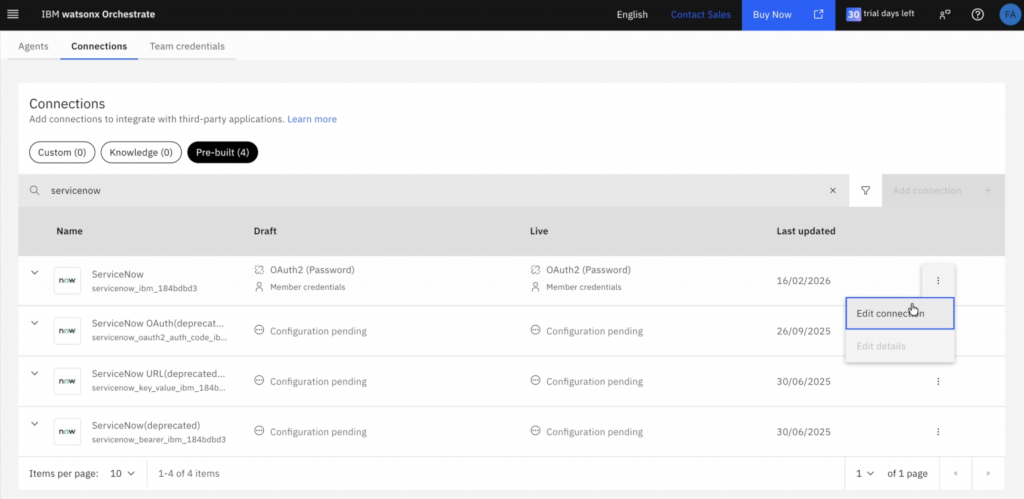
Navigate to: Manage → Security → Connections
Search for: ServiceNow
Create a new connection using: OAuth2 Password
Configure the connection using the following values:
Server URL:
https://dev123456.service-now.com
Token URL:
https://dev123456.service-now.com/oauth_token.do
Client ID:
Use the Client ID generated in the Application Registry
Client Secret:
Use the Client Secret generated in the Application Registry
Grant Type:
password
Scope:
Leave empty
The OAuth token endpoint is available through/oauth_token.do. [ibm.com], [servicenow.com]
Step 6: Choose Credential Scope
watsonx Orchestrate supports both Member Credentials and Team Credentials.
Member Credentials (Recommended)
Member Credentials are ideal when:
- Using your own ServiceNow Developer Instance
- Building a proof of concept
- Testing independently
When a ServiceNow tool is executed for the first time, watsonx Orchestrate may prompt:
Connect Apps
and ask for:
- Username
- Password
Use the credentials from your ServiceNow instance:
Username: admin
Password: your ServiceNow password
After successful authentication, the credentials are stored for your user account.
Team Credentials
Team Credentials are useful when:
- Multiple users share a ServiceNow environment
- A shared service account is available
- Several users need access to the same connection
For most demos and personal testing, Member Credentials are the easiest option.
Step 7: Deploy the Incident Manager Agent
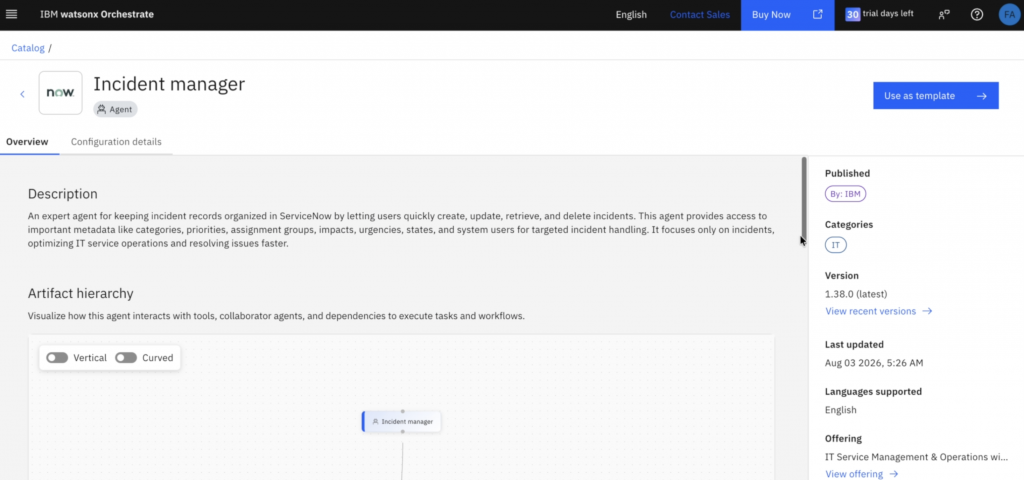
Open the Agent Catalog: Discover
Search for Incident Manager or ServiceNow in Apps
Deploy the agent and configure it to use your ServiceNow connection. You can just click on: Use as template.
The Incident Manager Agent can create, retrieve and manage incidents directly within ServiceNow using natural language requests.
Step 8: Viewing Incidents in ServiceNow
This is often the most confusing part.
By default, ServiceNow frequently opens a Self Service view that only displays incidents associated with the current user.
Common filters include:
- Caller = Me
- Created by Me
As a result, you may only see one or two incidents.
To see all incidents:
All → Incident → All
If filters appear at the top of the list view, remove filters such as:
- Caller = Me
- Created by Me
Once removed, you should be able to see the complete Incident table.
Step 9: Create Sample Incidents
To create test incidents directly within ServiceNow navigate to:
All → Incident → Create New
Some example incidents for a demonstration include:
VPN access not working
Impact: 1
Urgency: 1
SAP login failure
Impact: 2
Urgency: 2
Laptop provisioning request
Impact: 3
Urgency: 3
Having several incidents available makes it easier to demonstrate retrieval, summarization and prioritization capabilities within watsonx Orchestrate.
Step 10: Verify the Integration
The simplest way to validate the setup is to create an incident through the Incident Manager Agent.
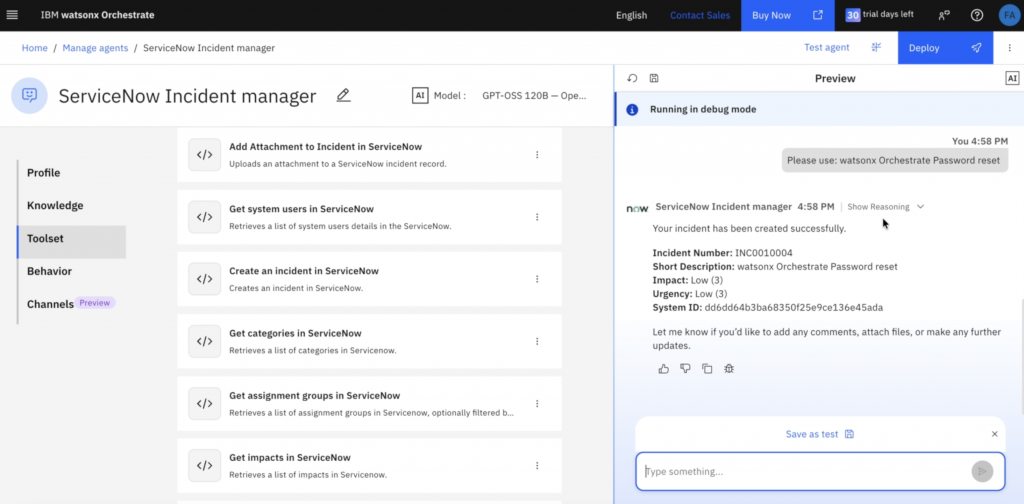
Open the watsonx Orchestrate chat and enter:
Create a ServiceNow incident with short description “watsonx Orchestrate Password reset”, urgency 3 and impact 3.
If successful, the agent should create an incident in ServiceNow.
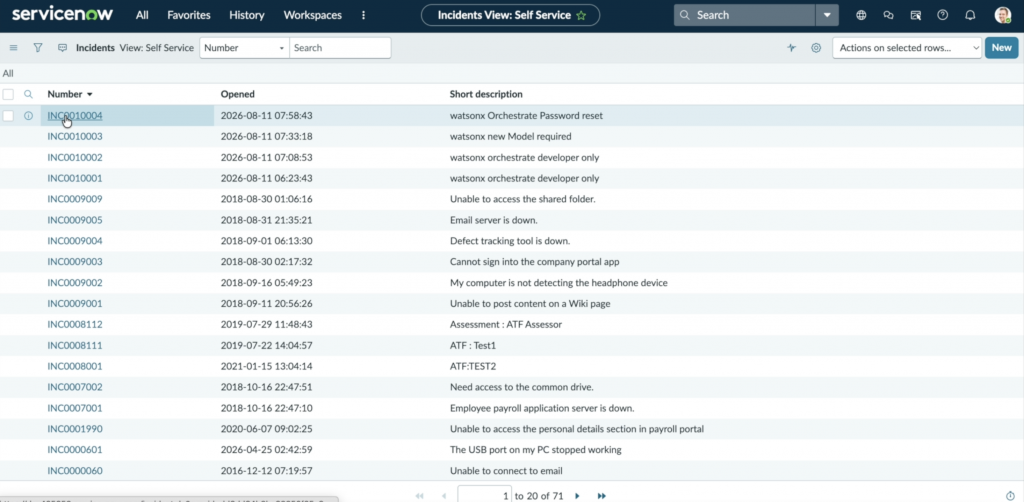
Return to ServiceNow and navigate to:
All → Incident → All
Refresh the incident list and verify that a new incident has been created.
A successful incident should contain: Short Description: watsonx Orchestrate Password reset
Impact: 3 (Low)
Urgency: 3 (Low)
Congratulations!
You have successfully connected watsonx Orchestrate to ServiceNow and used a prebuilt agent to create an incident through natural language.
Next Steps
Now that the connection is working, try prompts such as:
- Show all open incidents
- Show me the state of incident INC0010004
- Create a VPN outage incident
- Summarize all critical incidents
- Which incident should be addressed first?
- Create a management summary of all open incidents
This demonstrates how watsonx Orchestrate can integrate with enterprise applications such as ServiceNow in just a few minutes and enable users to interact with business processes through natural language, dramatically simplifying day-to-day operations.