
Artificial Intelligence in communication with end users is now an integral part of digitized companies. Chatbots are often used to answer general questions. Truly smart chatbots, however, should be deeply integrated into business processes to deliver real added value. Find out how to do this with Jira Software – developed by the Australian company Atlassian – in this blog post! (All documentation for this tutorial, as well as the code, is available here on GitHub.)
So what is Jira, though?
Well, Jira Software is the market standard to enable Scrum teams to plan, track and release software or products in an agile approach.
Jira Software provides a REST API that allows you to access your Jira projects with other software for common features like creating issues.
Imagine that users of your software or product can communicate e.g. bugs directly via a smart chatbot in natural language, this smart chatbot creates a new bug issue via the Jira REST API, which appears on your backlog. This way, developers can directly record and fix the bug reported by the user for the next sprint. This is an ideal scenario, because here the smart chatbot is directly integrated into the business process and deliveres real added value. With IBM Watson Assistant this is possible!
But enough said, let’s start with the hands-on part and build our smart chatbot.
If you haven’t done so already, sign up for an IBM Cloud account. (All documentation for this tutorial, as well as the code, is available here on GitHub.)
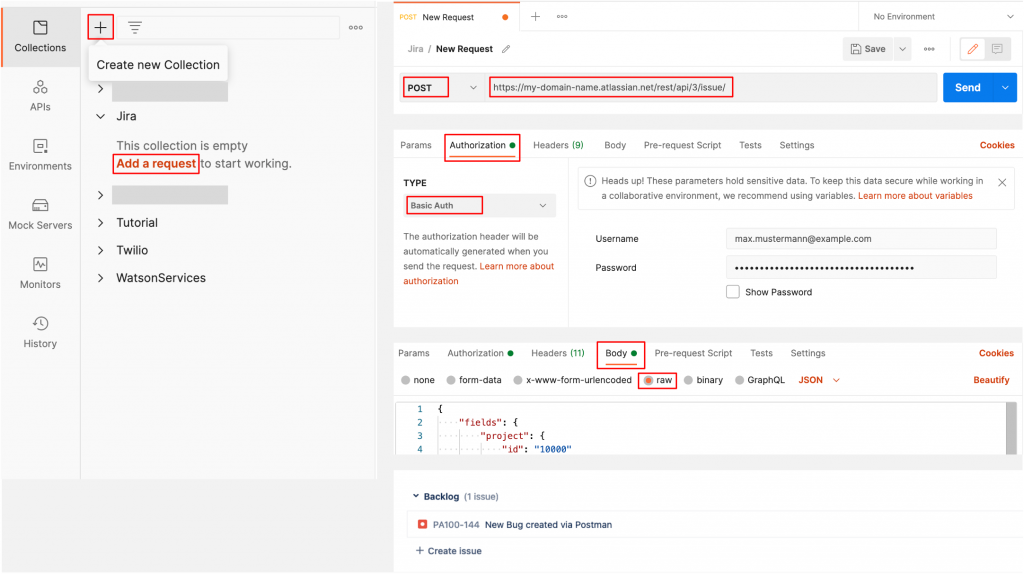
As a first step you can create your first issue via Postman and the Jira REST API. The corresponding documentation to create an issue can be found here.
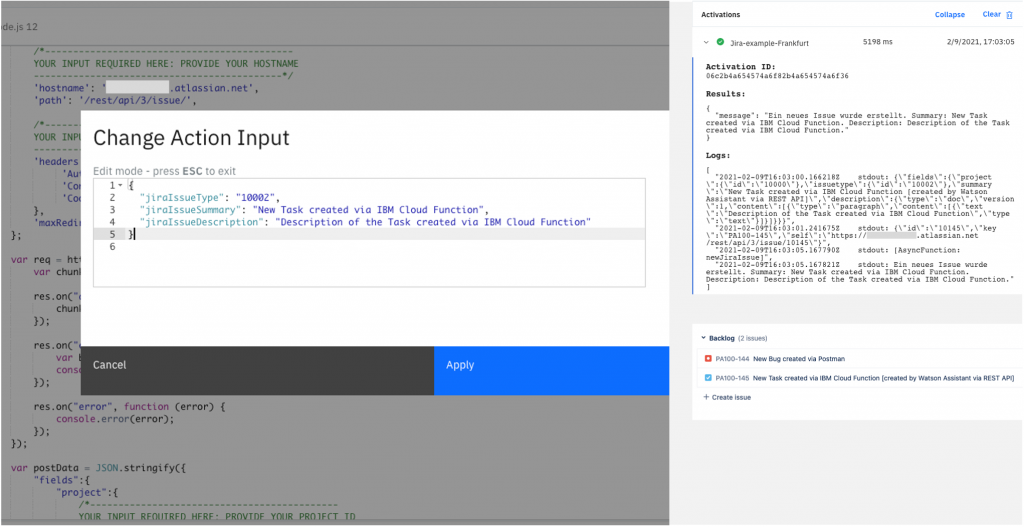
If your Post Request in Postman was successful you can select the native Node.js code and try the same thing, this time using Cloud Functions on IBM Cloud. You can invoke your function with parameters, provide some input, such as issue type, summary and description and click “Apply”, then click “Invoke”. Results are shown in the Activations pane. In Jira your new issue should be created.
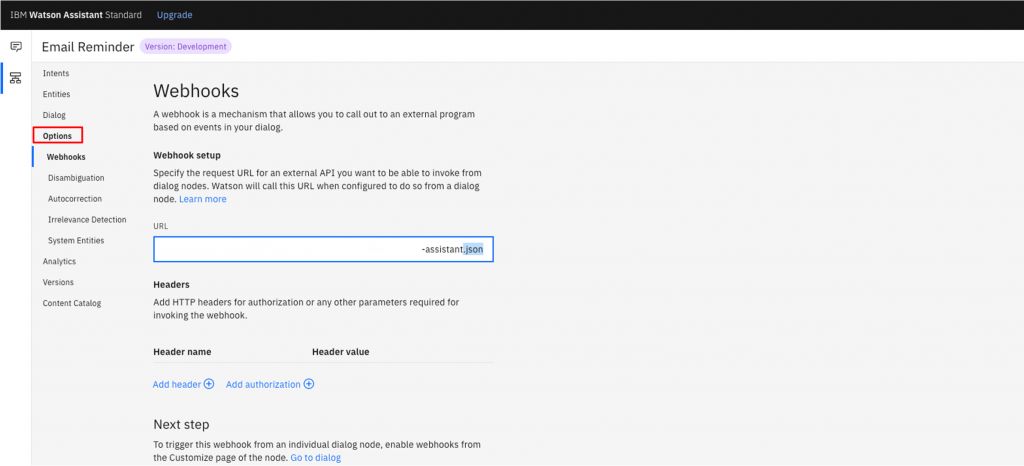
Now you can go to “Endpoints”, enable your Cloud Function as a Web Action and provide the endpoint in your Watson Assistant, under Options and then select Webhooks. Make sure to add a .json at the end. (All documentation for this tutorial, as well as the code, is available here on GitHub.) On GitHub a json-Skill is included, which you can import directly into your Watson Assistant Dialog skill.
That’s it already! This is how easy it is to make your chatbot really smart and embed it into business processes to create real value – using Watson Assistant on the IBM Cloud. For more details and code examples regarding this tutorial, please refer to this GitHub repository.